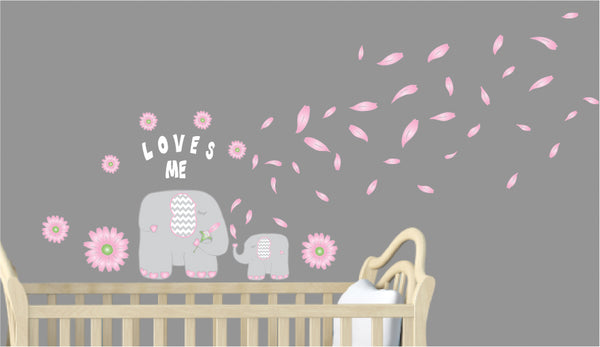

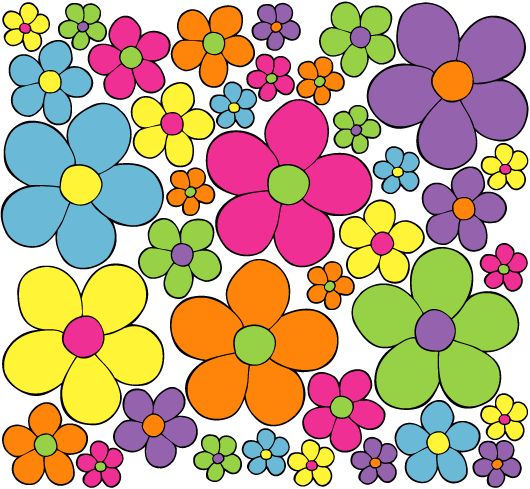
Flower Power Room Decor in about an hour, using Wall Decals
Time is something we have very little of, and every moment we spend with our family and friends has become so precious. I recently had an experience with decorating my daughters room that made the best of my time and found it to be a special moment with my daughter that I will never forget. My daughter is almost three now and has always had a fascination with flowers. She will pick any flower (even some weeds) and give them to me as a special gift. I've always wanted to fill her room with the bright flowers that she loved so much. I never made it much further than to purchase some bedding with flowers on it that was on sale at target. I've never thought of myself as much of a designer or artist, but I found myself inspired to finish my daughters room when I ran across some brightly colored daisy wall decals from Presto Chango Decor.com.
My inspiration came from an idea that was mentioned on there website stating that their flower decals could be placed on foam board/posterboard and cut out to make a curtain valance or even placed on the furniture. I purchase both a large Flower Wall Decals and small Flower Wall Decals of their daisy pop flowers and expanded a little on some of their idea's. First I planned to make a curtain valance. I bought some poster board that can be found at an art supply store, office supply, or even target that cost about two dollars for a 4ft.x 4ft. sheet. I first I measured the curtain rods in my daughters room and made sort of a half box out of the posterboard. My window just happened to be small enough to do this with the 4ft of posterboard, but keep in mind that if your window is larger than this it might be fine because the flower appliqués will overlap the valance box itself to some degree. My next step was to occupy my little one with a movie. Then I use a razor knife to carefully cut out a top piece to anchor to the top of the curtain rods and a piece to hang down the front. I first used a glue gun to bond the two sides together but later reinforced this with duck tape since the flower appliqués would cover the tape from sight anyway. I punched two holes on the top piece of posterboard on either side of the curtain rod using a screw and a screwdriver (you could use a drill or a whole punch if you have one handy). I then used regular trash bag ties to string through these holes to secure the posterboard to the top of the curtain rod. I peeled the flower decals from the backing and applied them to the remaining poster board and carefully cut them out with a razor knife. I then applied the new flower appliqués to my posterboard valance, using a glue gun. I stuck the larger flower wall decals (8in.)on first followed by overlapping the smaller flower wall decals being careful to cover any view of the duck tape on the valance behind it. After I was done, It looked amazing. I had seen this concept for this valance somewhere in one of the major department stores. I took tremendous pride in myself in creating the same valance using one of the smaller wall decal sets of the daisy pop flower stickers and some posterboard. All of which cost me about $30.00 total. My second idea was to use the flower wall decals as a template to trace them onto a felt fabric, and them apply them to an existing plain white curtain. I cut out various sizes of the daisy wall stickers (backing and all) with scissors. You can use any type of fabric you want like sheets or clothes that you no longer wear. I didn't have any of the right colors so I purchased some felt in 6 different bright colors to match the flowers. You can purchase the felt sheets in 1sq. ft. pieces for about .49 cents a piece at your local fabric store. I turned the flower wall decals face down on the felt, as not to damage them. I traced a pattern on the felt with a fabric chalk then cut them out. I use some small cups I had to trace the center dots for my felt daisy's. I used some fabric glue to adhere the center pieces on the daisies and then attack them to my white curtain. My third idea was to use old Christmas lights that no longer worked as a curtain tie back. I used some of the flower sticker/posterboard combination again and drilled little holes the back of the posterboard to place over the Christmas lights, securing them using the glue gun. It worked beautifully. It looked like flowers on a vine. I used the same concept as the curtain valance to create a wonderful headboard. Another idea that I would love to do if I knew how to sew, would be to take two plain white sheets, cut them to size to fit my comforter and then sew them together to make a cover. Then I would use velcro at one end , slide an old comforter in and use the same felt concept I used on the white curtain to make a matching comforter. By this time the movie my daughter was somewhat watching was over, and she made it clear that it was her time to help. The only thing left to do was to peel and stick the flower stickers to the wall, and furniture and we were done. This was the fun part, because my little girl could helped me. She went a little wild with her choices to stick the stickers, but she and I had so much fun. The whole project did take a little longer than an hour, but the memories will last forever. Laura Ward Mother, Wife, and School Teacher